RCA AR88D overhaul
Before you start, please read this disclaimer .
.
I was given my AR88 a number of years ago by my friend and colleague G3UHH, sadly no longer with us. Since retiring, I've started to refurbish it. The only circuit diagrams I've ever seen are of a very poor quality and, to me, are drawn in a strange way. So the first job was to redraw it more conventionally, with the valves the right way up!
Next I checked all the resistors. Carbon composition resistors are notorious for going high in value. I always unsolder one end to remove any parallel paths, thank goodness for Pro Wick! I replaced 10 resistors that were out of tolerance, many by + 50% to 80%. Fortunately I had some NOS 1watt resistors for replacements. I like to keep the chassis looking as near as possible to original.

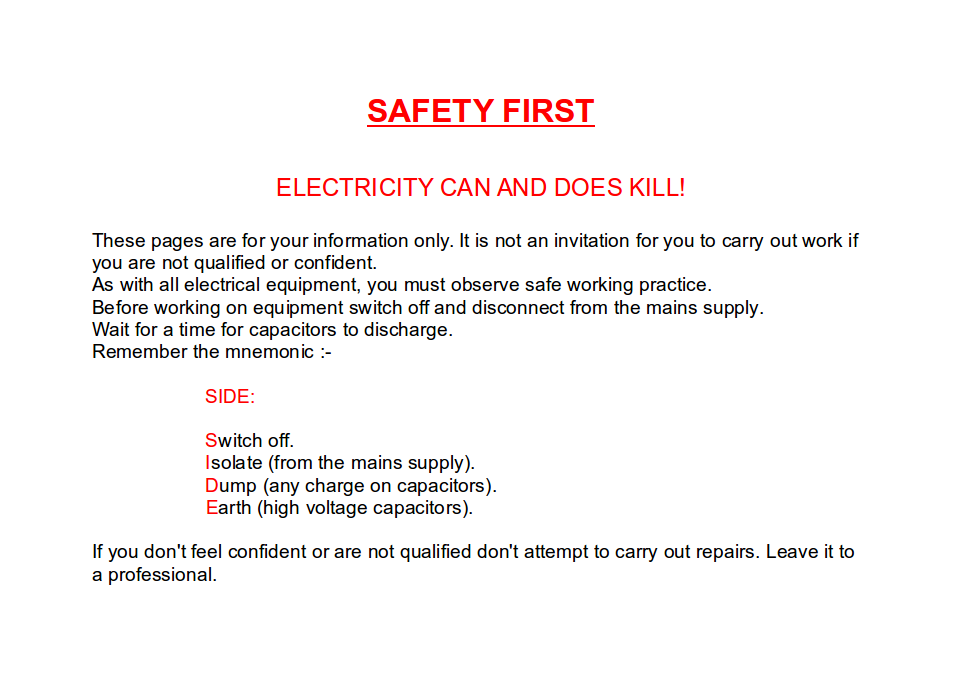
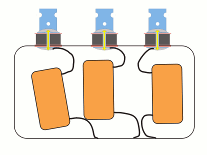
Modified Bathtub Capacitor

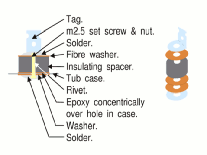
Bathtub Tag Repair
Then to tackle the capacitors. First the 6 bathtubs, all were leaky, between 200k and 5M. Most of the orange rubber sealing washers on the tags were perished and sticky with some leakage of oil.
This is how I refurbished them. Clamp the case in a wood faced vice and using a narrow wood chisel remove most of the solder. It is then quite easy to prise off the base and, using long-nose pliers, peel open the bottom like a sardine tin. Discard the bottom cover and clean out the case. Then remove as much as possible of the solder on the tag. Next drill an m2.5 hole through the rivet centre, then from inside drill off the rivet end. New red fibre washers are from Model Fixings, 3 per tag are needed. Note that the washers on C99, C112 and C113 are larger.Next the 15 moulded case type capacitors and again all were leaky. They appear to be moulded mica but are in fact paper. Cut off the leads flush with the case and clamp in the vice. Using a junior hacksaw with a well worn blade (with no set, to give a narrow kerf) carefully saw around the mould line. Then ease the case apart with a knife. When cleaned there is enough space to house a 1kV ceramic disc capacitor. When the case halves are cemented together with epoxy resin, the joint is almost invisible. C119 from V11 anode was slightly leaky, if this goes short circuit then it will take the output transformer primary with it. Remove the cardboard outer case and fit three 1nF 2kV disc ceramic capacitors in parallel. Make two end discs for the tube and fix them with epoxy resin.
The condition of the valves were checked and only the mixer, 6SA7, was low emission. I found a replacement on eBay.
WORK IN PROGRESS
Next job is to build a wobbulator to check the IF alignment response curves. I'll update this page in due course.
Peter Lawson, 6th February 2016.